We don't make mistakes we just change our plans-

Carla Rodio


Search This Blog

Thursday, November 11, 2010

Walker bag tutorial

Do you have a loved one that uses the assistance of a walker to get around? When both hands are occupied it is difficult to carry things around with you. Here I have written out some dimensions and directions for a bag that you can hang on the front of the walker. They are very easy and quick to make so that you can construct one or several. (It's probably quicker to make one than to read my directions.)

Someone at my quilt club brought in some directions so that we could make a few bags to donate to local nursing homes. I added some photos to, hopefully, make the directions a little clearer. The finished size is 15" square with a drop of about 4".
Choose a tightly woven medium to heavyweight fabric for outside bag and a tightly woven lightweight fabric for lining.
You will need 5 16" squares.
2 for the outside
2 for the lining
1 for the exterior pocket
You will need 2 6"X10" pieces for straps.
And you will need 2 1 1/2" pieces of sew in Velcro,
Fray Check, sewing machine, thread, iron, etc.
All seams are 1/2'.
Basting seams are 1/4"-3/8"
RST= Right Sides Together
I highly recommend pinning all seams.
Sew 3 sides of the lining leaving a 6" opening on one side. Set aside.

On each strap, fold in a 1/2" seam on three sides. 2 long sides and 1 short side, press in place. Fold in half lengthwise, wrong sides together, aligning edges, and press in place. Top stitch 1/8" around open sides. Finished strap should be about 2 1/2" by 9 1/2" with one end finished and one end raw. Apply hook side of Velcro. RST,to finished end of each strap. Do plenty of reinforcement stitching here as constant oopening and closing puts a strain on the stitches holding down Velcro.
Position a strap 2" inches from each edge with raw edges all lined up evenly with top of bag and Velcro side up. Baste in place.
Fold pocket fabric in half and pin to bottom half of bag front. The fold of the pocket will be halfway down the bag. Make sure that the raw edges of the pocket are even with the bag front on the sides and across the bottom. Baste in place. Do not sew top of pocket closed.(kind of defeats the purpose of the pocket)
Stack front and back of bag RST. Pin, sew down one side across bottom and up the other side.
Reinforce stitching (sew back and forth across it right on the seam line) at the the top of the pocket on each side.

Note: You can just barely see where I did 3 diagonal stitches across the corner. This will make for a squarer corner.
Trim a triangle off of each corner to reduce bulk.

Turn bag right side out. Poke out the corners.

Place bag inside lining (lining will be wrong side out). Pin the top of the bag to the top of the lining lining up seam allowances. Sew all around top of bag/lining. Do some reinforcement stitching across the straps.

Pull side opening of lining slightly apart. It's "crowning".
Pull bag out through the opening.

Fold seam allowance of opening in. Pin closed.Sew opening closed by machine or by hand.

Tuck lining down inside bag.
Press.

To increase sturdiness apply Fray Check (or equivalent) to upper pocket corners.


Topstitch around top of bag 1/8" from edge. Position Velcro loop strip and sew in place with plentyof reinforcement stitches.

Ta Da!
If you should decide to make this bag; could you please post a picture and notify me? I would dearly love to see a photo.

Monday, October 4, 2010

This past weekend my hubby and I traveled to a family wedding in Pennsylvania. We had a lovely time and this is the quilt that I made for a very sweet bridal couple. The bridal couple: Billy and Cara.

Block detail.


Block detail.

Thursday, September 23, 2010

Is it chow chow or piccalilli?

It's chow chow; just the way I grew up with it. Everyone knows that when you have lots of green tomatoes you make green tomato relish. I couldn't find my Kerr recipe book so I trolled around the internet for a recipe similar to the one that I had grown up with. It seems to me that chow chow and piccalilli were interchangeable terms. I couldn't find one that matched up to my memory so I dug around a little harder and found my Kerr canning book. According to Kerr, chow chow has no cabbage and piccalilli does. Otherwise they are pretty similar. So I whipped up a batch. By the way, a peck is two gallons. Finished product.
Veggies waiting to be ground up along with my toe.

Ground up veggies steeping in salt overnight. Note stainless steel pot.


Squeezed out veggies being adding to the cooking pot along with muslin spice bag.


Wednesday, August 25, 2010

Quick and easy

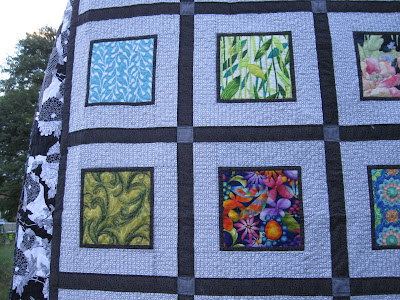
My friend Penny called and asked for an easy pattern to make for her niece. Her niece, Kat, had graduated from high school this year and she was leaving Aug. 24; so Penny had to get it in quick. I whipped up three different patterns on EQ6 and she chose the one she liked best and we toddled off to the store and picked out some gorgeous fabrics and it truly came out beautiful. Finished 72 X 90.


Saturday, August 14, 2010

baby ducks, car caddy/mat

They were so cute. They hatched yesterday. I would have gotten better photos but mama was pretty distressed so I just took the one and got out of there. The lady across the street has lots of animals and my grandson just loves to go over there and look at them.
I found this really neat tutorial here. I whipped up a couple; one for my grandson to use while he's with nana and one to give away at a baby shower. I couldn't find any road fabric until, of all places, I found some at Walmart. Then I just used some corduroy for the backing that I had in my stash.


Monday, July 19, 2010

Green pea popsicles

In China, the manufacturers of ice cream novelties think a little differently than the American manufacturers. This isn't actually ice cream. It is crushed green peas mixed with a little sugar but it is made just like a Popsicle. My daughter gives it to my grandson after she has finished her shopping and they are on their way home. Then he's free to trash his shirt. In this photo he is almost 17 mos old. Pretty good motor skills.
Here is my daughter, son-in-law, and grandson on the Great Wall of China.

Here is my husband and grandson attending a Yankee game on July 29th, 2010. They attended with a large party of relatives. I see the photo is dated the 30th. It (the camera) must still be on Chinese time.


A few of the latest bloomers from my garden.


Tuesday, July 13, 2010

Hemerocallis 'RAM'

I have several hemerocallis cultivars but I think this one may be my favorite. It is RAM, bred by Oscie Whatley.

Monday, July 12, 2010

The last graduation quilt of '10

Well the graduation season was fun while it lasted. Now on to other projects.
back detail

Wednesday, July 7, 2010

A few photos from the past few days

A beautiful bride with her four nephews. My grandson is the one all the way to the right. He's definitely the cutest of the four. This is the bride that my co-mother-in-law and I made this quilt for. My daughter, my grandson's mother, is the one all the way to the left. The first time she's ever worn high heels.
My grandson and my son-in-law. My grandson is just the most cheerful little guy.


My grandson with my youngest daughter at the reception.

My grandson playing with another little boy at the reception.


Monday, July 5, 2010

anna's quilt

Isn't that a cute print? This is another lap size quilt for a graduate at church. It whipped up quick and easy. Quilting detail
Front detail.

Back detail.

Monday, June 28, 2010

amish sampler quilt

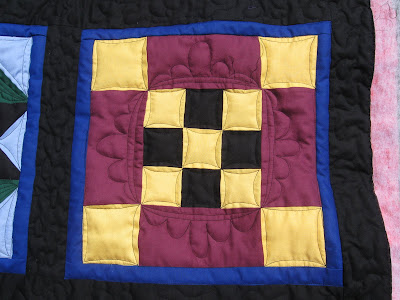
I prevailed upon a friend of mine from church in order to quilt her top for her. "Very well, but only if you meander." I truly meant to only meander all over those beautiful blocks but when presented with fifteen blank slates; I lost it. "Look at it this way," I told her, "You are assisting in my artistic development." My favorite was the card trick block.