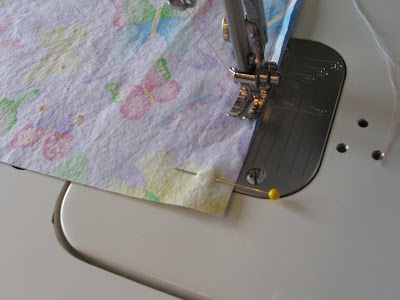
The other night at book club, we were tasked with bringing a refreshment that contained eggs. (in honor of Easter) I thought to myself..... Butterflies come from eggs! So I whipped up these little dahlins. A lady from quilt club had passed out instructions on how to complete these little babies so I thought that I'd add some photos to ease the construction.
You will need:
two fabrics
thread
basic sewing suppplies
Some handy notes to keep in mind as you sew: Backtack at beginning and ends of seams and trim thread ends as you go along.

Cut out a 6 1/2" x 8" piece from each of the fabrics and decide which is the outside and which is the lining.

Place Right Sides Together (RST) pin, and sew a 1/4" seam down each of the 6 1/2" sides.

Press seams open using the tip of your iron. (so that it won't put unintended creases elsewhere)

Turn your piece right side out and press it flat along the seam lines.

Topstitch 1/8" from the sewn edge.

Fold your holder in half RST, matching up seams to find the center, use a pin to mark the center of each 8" edge.

With outside facing up, fold each seam into the center RST so that the sewn seam will be touching the marking pin. Remove marking pin and pin in place.

Sew 1/4" seam across both ends, removing each pin as you sew up to it. Sew back and forth across center to reinforce the edges of the opening. Trim a small triangle off of each corner so that the corner will lie nice and flat when you turn it to the right side.

Zigzag, serge, or treat raw edge with Fraycheck to keep edges from ravelling.

Turn right side out taking care to push the corners out.

Place your travel pack tissues inside and voila, finis!

Check out other completed projects:
http://www.amylouwho.com/2010/04/sew-tell-guess-what-i-did-this-week.html
wow, this is amazing and looks simple and fun. great idea and great finish
ReplyDeleteWonderful project! Looks simple and a great little gift!
ReplyDeleteGreat little project, and my tissues could use a little more style!
ReplyDeleteLovely. What sweet gifts.
ReplyDeleteWhat a great idea! Thanks for the detailed tutorial.
ReplyDeleteYou know, I really should carry one of these. My kleenex are always wadded up in my purse. Cute idea & thanks for sharing the tutorial.
ReplyDeleteVery cute idea! Love that sweet butterfly print. :o)
ReplyDeleteThese will make great gifts! Thanks for the great idea!
ReplyDeleteThanks for the tutorial! I have received one as a gift but never made one. I love mine and would like to make some for friends. Thanks for sharing!
ReplyDelete